

Building My Own Paddle!

As I gear up for my 3 month journey from the Northwoods of Minnesota to the gulf of Mexico, one of the things I am having to do is fill in any gaps in my camping gear. Waterproof map holders, a PFD, and a new raincoat to name a few. One of the most crucial things I needed was a paddle of my own. And rather than buying one I thought I would make one from scratch. I'm always looking to improve my woodworking skills and this seemed like a great way and to get a functional piece of equipment as well!
This winter, I took a paddle-making class offered by Urban Boatbuilders, with the intent of using it for my Source to Sea journey of the Mississippi River! So far, it’s looking like that is going to be achieved! Here is the process of how I got here:
Making the Paddle Blank
The first step was to make a paddle ‘blank’ which essentially some planks of wood laminated together in the very rough form of a paddle.
I opted to go for an ash shaft, walnut trim, and ash blade.
Once I had chosen my wood, the next step was to get everything snug in the mold, as a sort of a dry run before gluing. The gluing was done with epoxy, so there was a limited working time, and everything had to be streamlined beforehand.
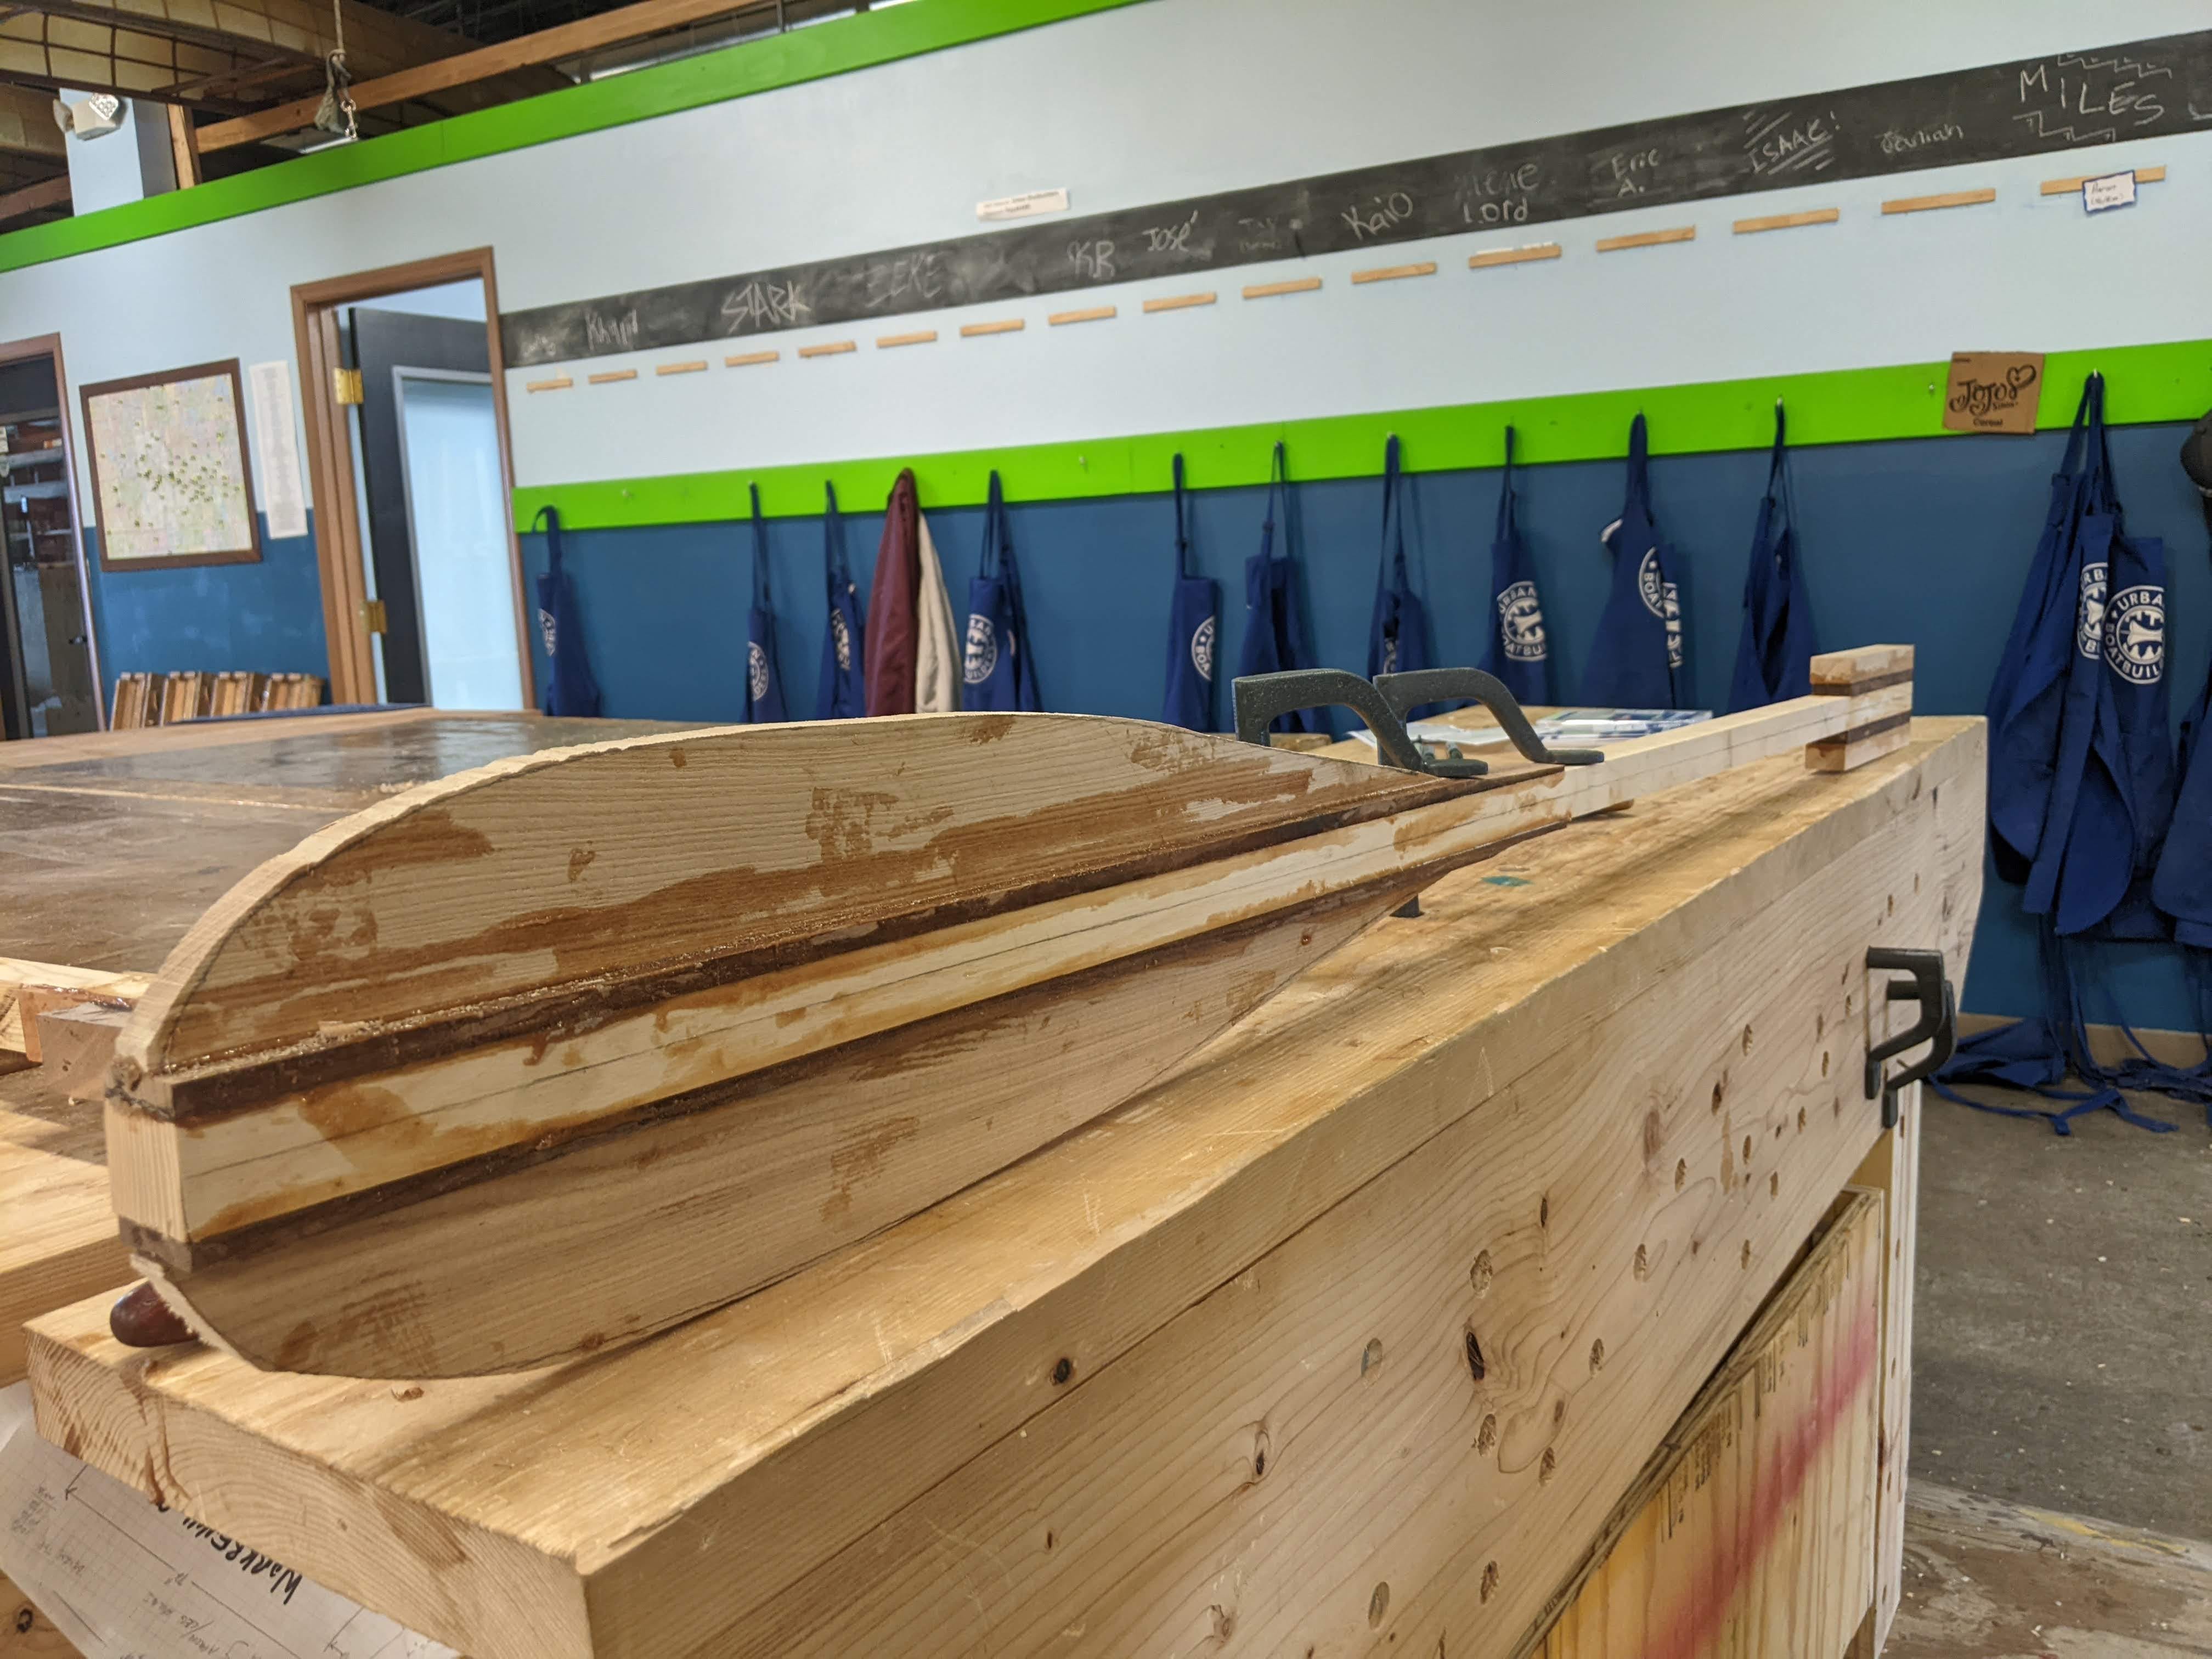
By the end of the first night, the paddle blank was glued together in the mold, and clamped down.

Fast forward 48 hours, and this is how it popped out of the mold:

Shaping the Paddle Blade
Now, the final paddle was in there somewhere, just buried within a lot of extra wood that I had to remove. The first thing done was to take it to the band saw the get the rough form of the paddle:
The next step was to shape the ‘spine’ of the paddle. The paddle is ideally as lightweight as possible, so it’s beneficial to shave as much wood off the blade as possible (the largest part of a paddle). On the other hand, a paddle must be strong and durable as well, and thickness helps with that. A spine is a balance between those two worlds. Most of the blade will be under 1/2 of an inch thick, and the shaft is about 1 1/2 inches thick. The spine is a gentle tapering of the shaft as it melds into heart of the paddle blade. Offering strength to the center of the blade, but not adding too much weight.

After this, it was time to cut the paddle blade down to it’s final thickness. This step removed a lot of wood, and the paddle was noticeably lighter after!

By this point, the paddle blade was roughly in it’s final shape. See below:

From here, the process was largely by feel and by eyeballing. I used a spoke shave to connect all the planes, and wear down any right angles until they were nice and smooth.

Shaping the Handle
Shaping the handle was largely the same process with different details. I first ran it through the band saw to get the rough cut. Then another cut to form the narrowness of the grip. After that, it was straight to rounding it out by feel.


After a very full day of work, I was exhausted. But the paddle looked a lot more like a paddle than when the day started, when it was still in a mold!

Final Touches
The last major thing to do was to round the shaft. Which I did first with with the spoke shave, and then fined tuned with some very gritty sandpaper. After this I progressively sanded the entire thing with finer and finer sandpaper.
Now it was time to add my own personal touch. I wanted the paddle to be unique and beautiful. I decided to woodburn a design on the paddle blade.

The only thing left to do was add some protective varnish. I added 3 coats and it came out looking great!
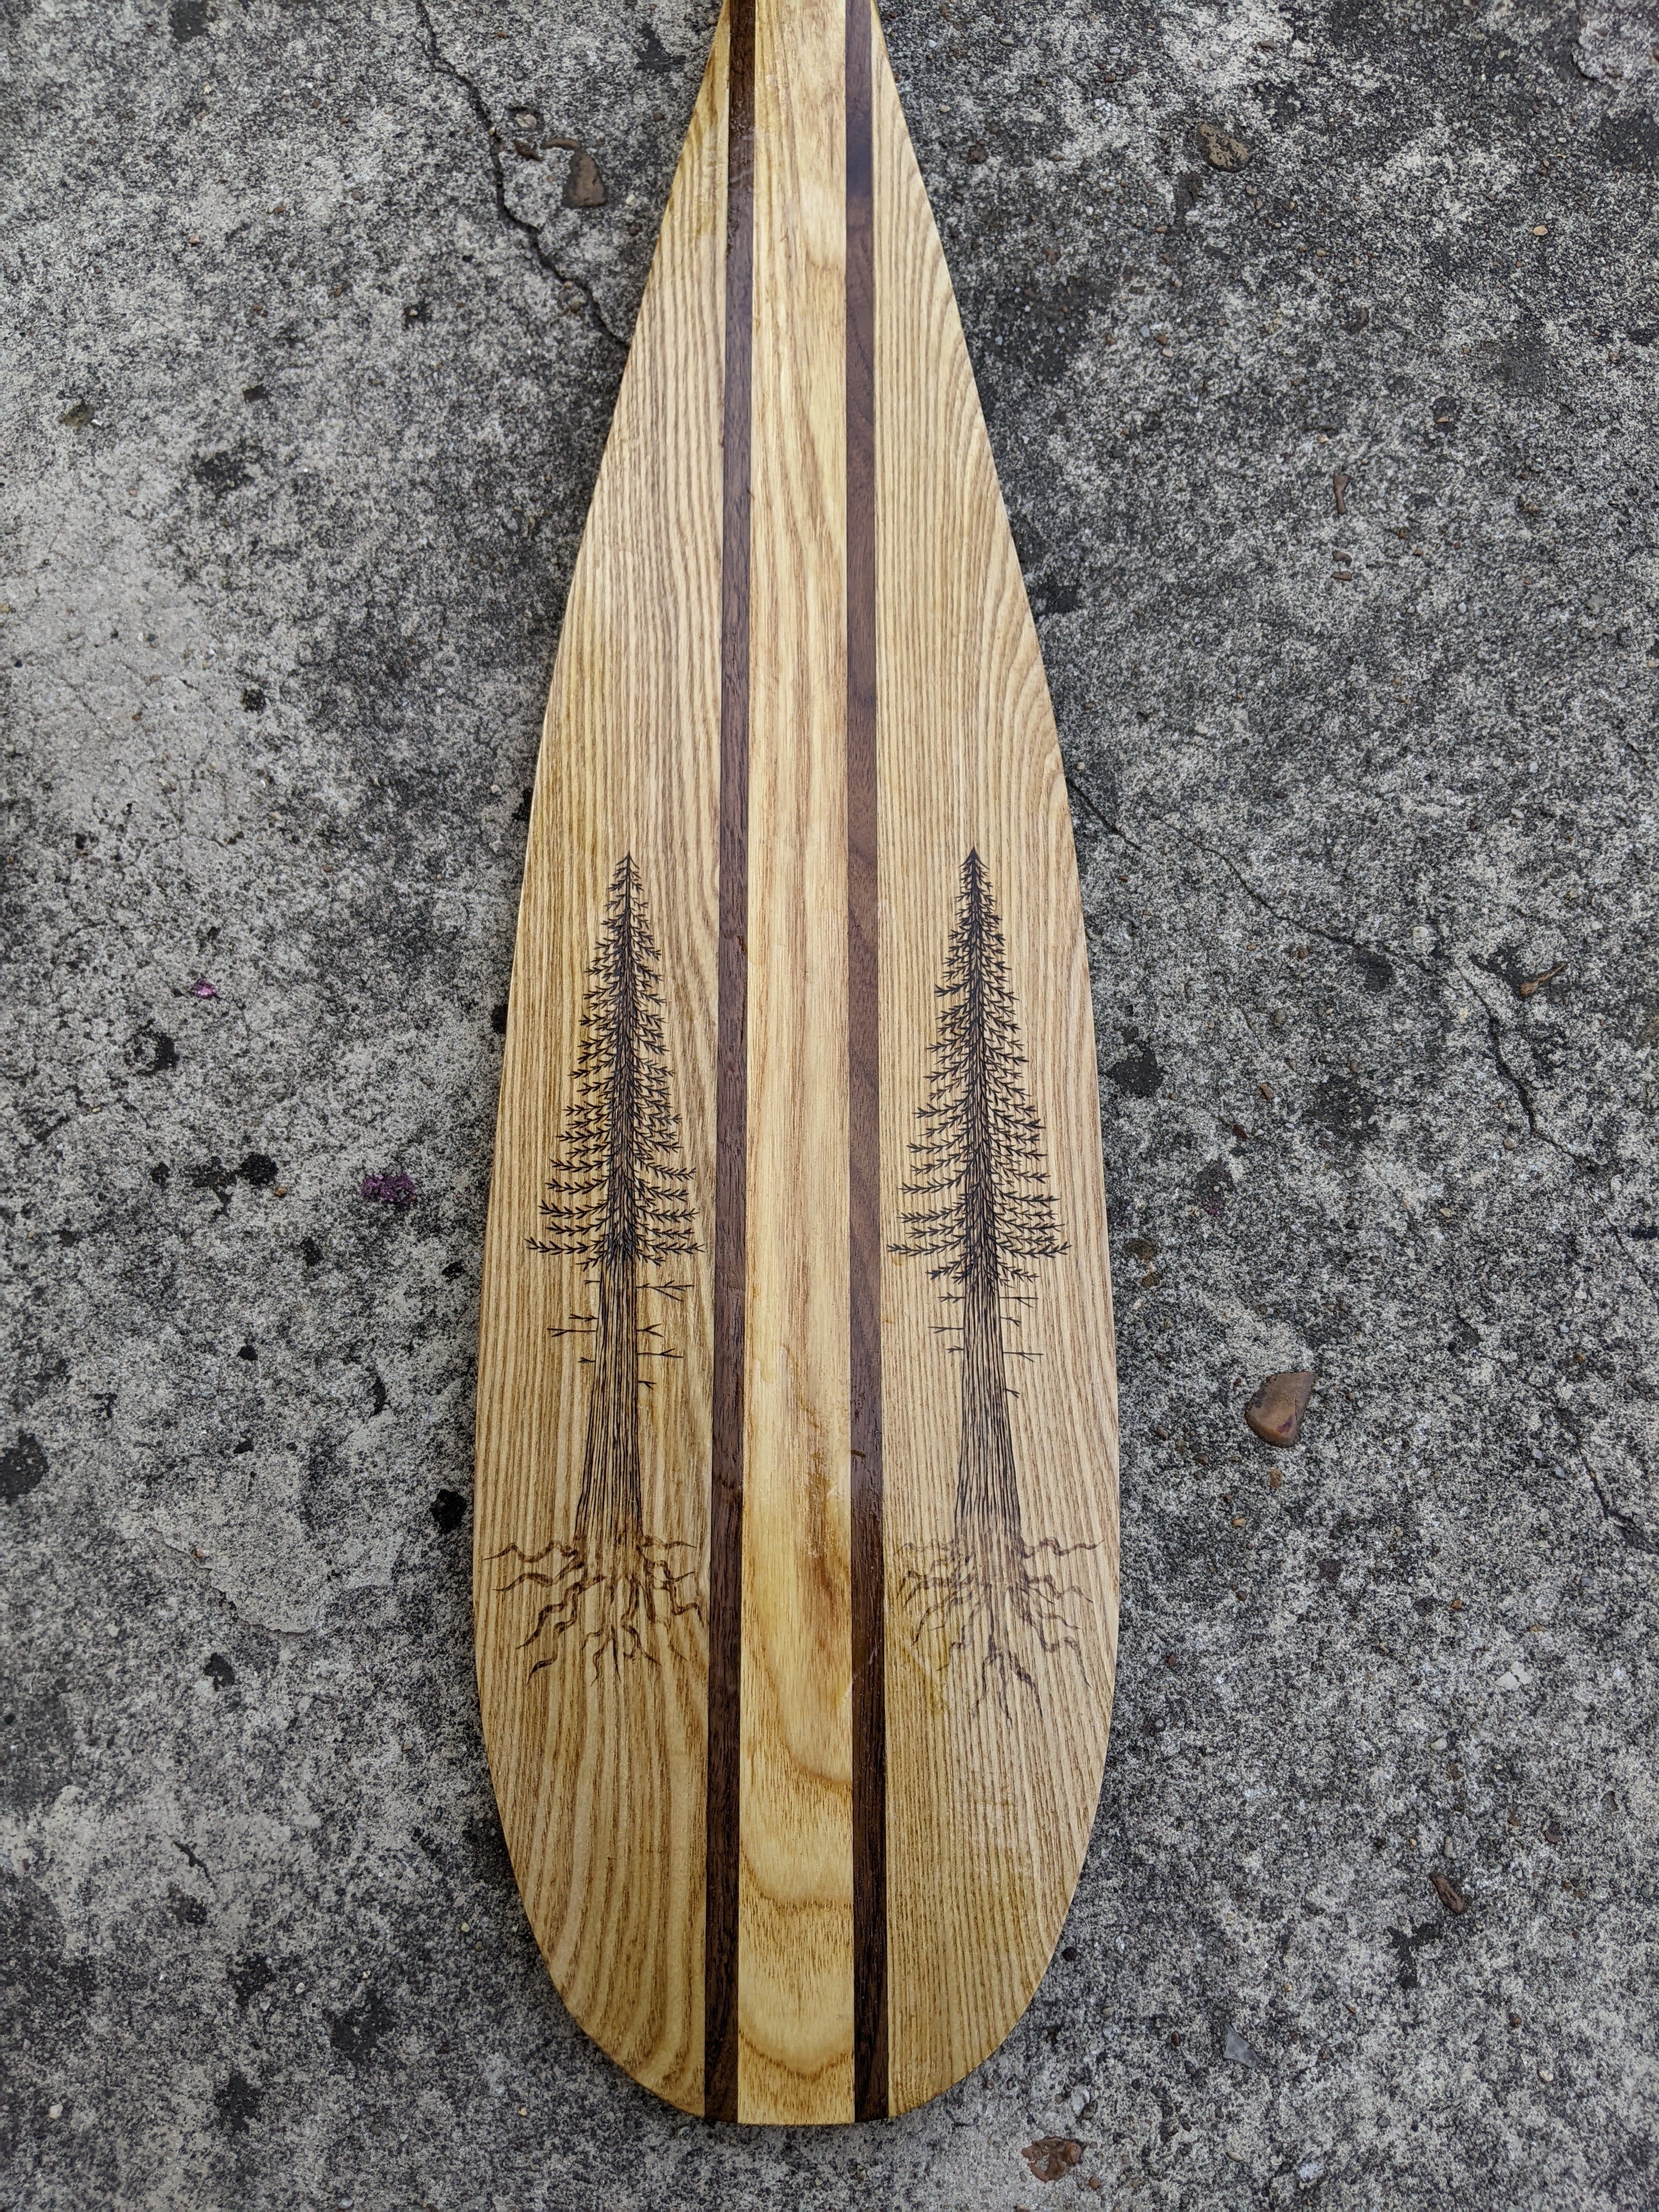

Now I have a unique, sentimental paddle built with my own two hands! I plan to use this for the entire journey but I will of course have a backup as well!
Next step: finding a canoe!
Wow--great job! I'm curious about why the laminated wood is used, rather than a single piece of wood.